A cracked or burst PVC water pipe can flood your basement in minutes — especially with the extreme temperature swings we see in the Okanagan, from -20°C winters to 35°C summer heat. When pipes rapidly expand and contract, even a small weakness can turn into a major leak. Whether you're dealing with a slow drip, a split pipe, or sudden water damage, knowing how to shut off the water and make a fast repair can save you thousands in cleanup costs.
In this guide, we’ll show you:
- How to stop the leak immediately
- Temporary fixes that actually work
- How to stop the leak immediately
- How to permanently repair PVC pipe using proper solvent welding
- When it’s safer (and cheaper) to call a licensed plumber
Let’s protect your home before that small crack becomes a costly disaster.
Key Takeaways
- Control the Situation Before You Repair: Your first move should always be shutting off the main water supply. This single action stops further damage and gives you the time to gather your tools and assess the problem without panic.
- A Permanent Fix Requires a Chemical Weld: For a repair that lasts, simply gluing PVC isn't enough. You must use both primer and cement to chemically fuse the new pipe section to the old, creating a single, solid piece that can withstand pressure.
- Recognize When a Pro is the Safer Bet: A simple, exposed pipe is a manageable DIY. However, if the break is inside a wall, seems complex, or causes a major leak, calling a professional prevents a small problem from turning into a costly disaster.
Common Causes of Broken PVC Pipes
Understanding why your PVC pipe failed helps prevent it from happening again — especially in the Okanagan’s extreme climate. Here are the most common causes of broken PVC water pipes:
1. Freezing Temperatures
When water inside a pipe freezes, it expands. That expansion creates intense internal pressure, which can crack or split PVC — particularly in uninsulated areas like crawl spaces, garages, and exterior walls. In the Okanagan, rapid freeze-thaw cycles make this one of the leading causes of burst pipes.
Prevention Tip: Insulate exposed pipes and keep indoor temperatures consistent during cold snaps.
2. High Water Pressure
PVC pipes are designed to handle specific pressure ratings. If your home’s water pressure exceeds safe limits (typically above 80 PSI), it puts constant stress on joints and fittings. Over time, this can cause:
- Hairline cracks
- Joint separation
- Sudden pipe bursts
Prevention Tip: Install a pressure-reducing valve (PRV) and have pressure tested annually.
3. Poor Installation
Improper solvent welding, misaligned fittings, or inadequate pipe support can weaken the system from the start. Common installation mistakes include:
- Not using primer before cement
- Inadequate curing time
- Uneven pipe cuts
- Loose support brackets
These issues may not show up immediately — but they often fail under seasonal stress.
Prevention Tip: Ensure repairs are completed by licensed professionals using proper curing times.
4. Ground Shifting
Soil movement from:
- Seasonal moisture changes
- Heavy rainfall
- Construction vibration
- Natural settling
can place stress on underground PVC lines. When the ground shifts, rigid PVC piping can crack or pull apart at joints.
Prevention Tip: Schedule inspections if you notice sudden drops in water pressure or unexplained wet spots in your yard.
5. UV Exposure
PVC exposed to direct sunlight for extended periods can become brittle. Over time, UV radiation weakens the material, making it more prone to cracking under pressure. Exterior irrigation lines are particularly vulnerable.
Prevention Tip: Use UV-resistant pipe or apply protective coverings to exposed outdoor plumbing.
Why Identifying the Cause Matters?
Fixing the leak is only part of the solution. If the underlying issue — pressure, freezing, shifting, or UV damage — isn’t addressed, the problem will likely return. A proper diagnosis ensures your repair lasts for years, not just months.
How to Spot a Hidden PVC Leak Before It Bursts
Finding a broken water pipe isn't always as dramatic as a geyser in the basement. In our region, soil shifting and frost heaves can cause slow subsurface leaks. Catching these early protects your home from structural water damage and toxic mold growth.
The 4 Red Flags of Pipe Damage:
- Visual Clues: Look for pooling under sinks, damp spots on drywall, or bubbling wallpaper.
- The "Green Patch" Effect: If a section of your lawn is suspiciously lush or soggy despite a dry Okanagan summer, your underground main line may be cracked.
- Pressure Drops: A sudden loss of "oomph" in your shower often means water is escaping before it reaches the tap.
- Hissing Sounds: If you hear water running or hissing behind a wall when all taps are off, you have an active leak.
What to Look For
Your eyes are your best first tool for detection. The most obvious signs of a broken pipe are visual, so it pays to be observant. Keep an eye out for pooling water under sinks, around the base of your toilet, or near appliances like your water heater. You might also notice damp spots, discoloration, or staining on your walls, floors, or ceilings. If a pipe is leaking behind a wall, you may see paint or wallpaper bubbling or peeling. Don’t forget to check outside, too. An unusually green or soggy patch of grass in your yard when the rest of the lawn is dry could signal a break in an underground water line. If you spot any of these signs, it’s a clear signal that you need to investigate your plumbing repairs options.
Changes in Your Water Pressure
Have you noticed your shower feeling weaker than usual, or does your kitchen faucet seem to have lost its power? A sudden or gradual drop in water pressure throughout your home is a classic symptom of a broken pipe. When water is escaping from a crack or break somewhere in the system, less of it makes it to your faucets, resulting in a weaker flow. You might also notice sputtering or spitting from your taps as air gets into the damaged pipe. Don't dismiss a change in pressure as a minor annoyance; it’s your plumbing system’s way of telling you that something is wrong and needs attention.
Sounds and Smells to Watch For
Sometimes, you can hear or smell a pipe problem before you see it. Listen for unusual sounds coming from your walls, like hissing, whistling, bubbling, or the distinct sound of dripping when no water is running. These noises often indicate that water is escaping under pressure. A musty or earthy smell in certain rooms, especially in basements or crawl spaces, can also point to a hidden leak that’s causing moisture to build up. If you notice a foul, sewage-like odour, it could be a sign of a broken sewer line, which requires immediate attention from a professional who handles drain and sewer services.
What to Do Before You Start the Repair
A successful PVC pipe repair starts long before you make the first cut. Taking a few minutes to prepare your space, tools, and yourself can turn a potential panic-inducing situation into a manageable task. Think of it as setting the stage for a smooth, leak-free fix. Rushing in without a plan is the fastest way to make a small problem much bigger, and nobody wants that. Let’s walk through the three essential prep steps you should never skip to ensure your repair goes off without a hitch.
Shut Off Your Main Water Supply
This is the most critical first step, and it’s non-negotiable. Before you do anything else, you must shut off the main water supply to your home to stop the flow of water to the broken pipe. This prevents further water damage and ensures you can work on a dry pipe. Your main shut-off valve is typically located where the main water line enters your house, often in the basement, a crawl space, or a utility closet. Once you’ve located the valve, turn it clockwise until it’s fully closed. To drain any remaining water in the system, open a faucet on the lowest level of your home. If you can't find your valve or it's stuck, it's best to call for professional plumbing repairs to avoid causing more damage.
Gather Your Tools and Materials
There’s nothing more frustrating than getting halfway through a repair only to realize you’re missing a crucial tool. Save yourself a mid-project trip to the hardware store by gathering everything you need ahead of time.
Here’s a basic checklist for a standard PVC pipe repair:
- Pipe cutter or hacksaw: For making clean, straight cuts.
- Measuring tape: To accurately measure the replacement pipe section.
- Marker or pencil: For marking your cut lines.
- Sandpaper or a deburring tool: To smooth the cut edges of the pipe.
- Clean rags: For wiping the pipe dry and clean.
- PVC primer and cement: Make sure you get the right type for your pipes.
- Replacement PVC pipe and fittings: Match the diameter and schedule of your existing pipe.
Having all your supplies laid out and ready to go will make the entire process feel much more organized and less stressful.
Don't Forget Your Safety Gear
Working with plumbing can involve sharp tools and chemical adhesives, so protecting yourself is key. Before you start cutting or gluing, make sure you have the right safety gear on hand. At a minimum, you should wear safety glasses to protect your eyes from flying debris or accidental splashes of primer or cement. A good pair of work gloves will keep your hands clean and safe from cuts and chemicals. Because PVC primer and cement release strong fumes, it’s also important to work in a well-ventilated area. If you’re in a confined space, a respirator mask is a smart idea to protect your lungs from inhaling harmful vapors.
Need a Quick Fix? Temporary PVC Pipe Repairs
A burst pipe can feel like a major crisis, but a quick, temporary fix can stop the water and prevent serious damage while you figure out your next steps. These solutions are designed to be short-term patches—they’ll buy you valuable time but won’t replace the need for a permanent, professional repair. Having one of these kits on hand is a smart move for any homeowner. Remember, the goal here is damage control, not a forever fix. Before attempting any of these, make sure your main water supply is shut off.
How to Use Pipe Repair Tape
Silicone repair tape is a fantastic tool for stopping small leaks in a pinch. This flexible, self-fusing tape creates a watertight seal when stretched and wrapped around a pipe, making it effective for minor cracks and pinhole leaks. First, dry the area around the leak as thoroughly as you can. Starting a few inches to one side of the damage, begin wrapping the tape tightly around the pipe, stretching it as you go. Overlap the tape by about half its width with each rotation. Continue wrapping until you’ve covered several inches on the other side of the leak. The pressure is what creates the seal, so don’t be shy about pulling it taut.
How to Apply a Rubber Patch
For a slightly more robust temporary fix on a straight run of pipe, a rubber patch or coupling with clamps is a great option. This method uses a rubber sleeve that fits over the pipe and is secured by metal clamps, providing a strong mechanical seal. You’ll need to cleanly cut out the broken section of the pipe. Once the damaged piece is removed, slide the rubber sleeve over one end of the pipe. Bring the two pipe ends together, then slide the sleeve back over the joint so it covers both sides evenly. Finally, use a screwdriver to tighten the clamps until you have a snug fit. This can hold things together until you can schedule a proper plumbing repair.
How to Work with Epoxy Putty
Epoxy putty is a moldable substance that hardens into a durable, waterproof patch. It’s ideal for sealing small, irregular-shaped cracks where tape might not work as well. After shutting off the water, use a clean cloth to wipe down and dry the leaky part of the pipe. For the best bond, lightly sand the surface to rough it up. Most epoxy putty comes in a two-part stick; simply cut off what you need and knead it until it’s a uniform color. This activates the hardening agent. Firmly press the mixed putty over and around the crack, making sure it’s completely covered. Let it cure according to the package directions—usually about an hour—before slowly turning the water back on.
How to Permanently Fix a PVC Pipe (Step-by-Step)
If you’re dealing with more than a tiny pinhole leak, a temporary patch just won’t cut it. A permanent repair involves cutting out the damaged section of the pipe and replacing it with a new piece. While it sounds intimidating, it’s often the most reliable way to solve the problem for good. This method creates a strong, seamless fix that becomes part of the pipe itself, giving you peace of mind that the leak is truly gone.
This guide will walk you through the process, but remember to trust your gut. If the pipe is in a hard-to-reach spot, the damage is extensive, or you just don’t feel comfortable making the cuts, don’t hesitate to call for professional plumbing repairs. A small mistake can lead to a much bigger water problem, and our team is always ready to help 24/7.
Prep Your Workspace
First things first: you absolutely must shut off the water to the pipe you’re fixing. Find your home's main water shut-off valve—it’s usually in the basement, a crawl space, or a utility closet—and turn it clockwise until it’s fully closed. Next, open a faucet at the lowest point in your house (like a basement sink or outdoor spigot) to drain any remaining water from the system. Place a bucket and some old towels under your work area to catch any drips. A dry, clean, and well-lit space is essential for a safe and successful repair.
Cut Out the Damaged Section
Your goal is to completely remove the broken part of the pipe. Using a PVC pipe cutter or a hacksaw, carefully cut out the damaged section. A good rule of thumb is to measure about an inch past the visible crack on both sides and make your cuts there. This ensures you’re working with solid, undamaged pipe. Try to make your cuts as straight and clean as possible. Once the piece is removed, use a deburring tool or a piece of sandpaper to smooth out the inside and outside edges of the remaining pipe. This simple step is key to getting a perfect, leak-proof seal with your new fittings.
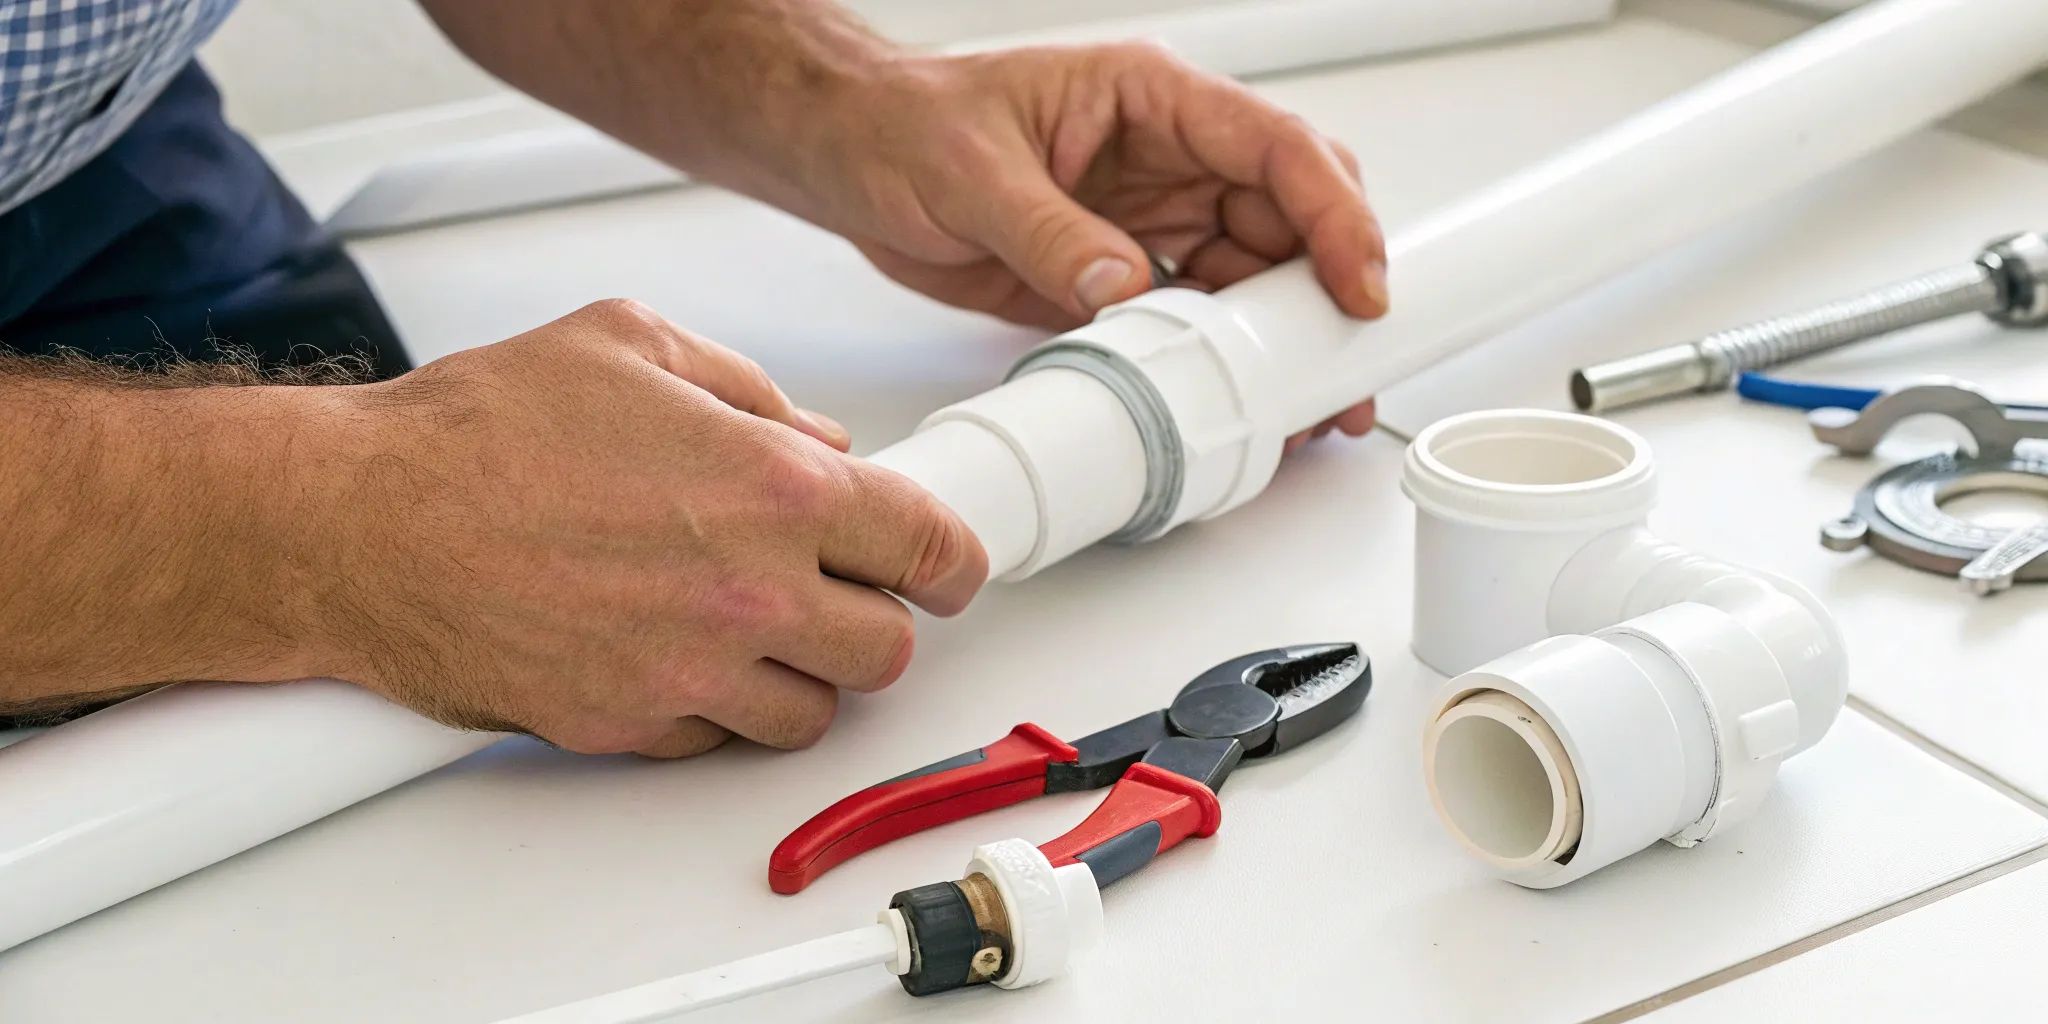
Install the New Section (The Chemical Weld)
For a repair that lasts, you aren't just "gluing" pieces together—you are creating a chemical weld that fuses the two plastics into one.
- Dry Fit First: Cut your replacement PVC and fit it into the couplings without glue to ensure the alignment is perfect.
- Prime the Surface: Apply PVC primer to the outside of the pipe ends and the inside of the fittings. This softens the plastic for the bond.
- Apply Cement: Immediately apply a thin layer of PVC cement over the primer.
- The Twist and Hold: Push the pieces together with a quarter-turn twist to spread the cement evenly. Hold firmly for 30 seconds to prevent the pipe from "pushing out" of the fitting as the chemical bond forms.
Test Your Work for Leaks
Patience is key here. PVC cement needs time to cure before it can handle water pressure. Check the instructions on the can, but you should generally wait at least an hour. Once the cure time has passed, it’s the moment of truth. Go back to your main shut-off valve and turn the water on slowly. Head back to your repair and watch it closely from all angles. Look for any drips, beads of moisture, or wet spots. If it’s completely dry, congratulations—you’ve successfully fixed the pipe! If you do spot a leak, you’ll need to shut the water off and start the process over.
Avoid These Common PVC Repair Mistakes
You’ve done the hard part of finding the leak and gathering your tools. Now, let’s make sure your repair actually lasts. After more than a decade in the field, I’ve seen how a few small, easy-to-avoid mistakes can turn a simple fix into a much bigger headache. Getting the details right is what separates a solid, leak-free patch from a surprise indoor water feature later on.
Successfully repairing a PVC pipe is all about technique. It’s not just about slapping on some glue and hoping for the best. From the way you cut the pipe to the materials you choose, every step matters. Rushing the process or taking shortcuts can lead to a weak joint that fails under pressure, forcing you to start all over again. Taking a moment to understand these common pitfalls will save you time, money, and the frustration of a failed repair. If you ever feel like you’re in over your head, remember that professional plumbing repairs are always an option.
Common Installation Mistakes
One of the most frequent mistakes I see is overtightening threaded PVC fittings. It feels like tighter should be better, but cranking down on the connection can cause stress fractures in the plastic, creating a new leak right where you tried to fix one. The fitting should be hand-tight, plus one or two gentle turns with a wrench—no more. Another common slip-up is improper gluing. You need to apply a coat of PVC primer to both the pipe and the fitting first, followed immediately by cement. This process chemically cleans and softens the plastic, allowing it to fuse into a single, solid piece.
Choosing the Wrong Materials
Walking into the plumbing aisle can be overwhelming, but grabbing the right materials is critical. Not all white plastic pipes are the same, and using the wrong type of cement is a recipe for failure. For example, you must use PVC cement for PVC pipes; using ABS cement (for black plastic pipes) won't create a proper chemical weld. Always double-check that your new pipe section and fittings are the exact same diameter and schedule (a measure of wall thickness, usually Schedule 40 for residential plumbing) as the pipe you’re repairing. When in doubt, cut off a small piece of the damaged pipe and take it with you to the store to match it perfectly.
Ignoring Temperature and Pressure
The environment you're working in plays a big role in how well your repair sets. PVC cement cure times are highly dependent on the ambient temperature and humidity. In colder Okanagan weather, the cement will take much longer to fully cure before you can safely turn the water back on. Always check the manufacturer’s instructions on the can for specific cure times. Also, remember that standard PVC is not rated for hot water. If you’re repairing a hot water line, you must use CPVC (a light yellow or cream-colored pipe) and its corresponding cement to prevent the pipe from warping and failing.
How to Prevent Future PVC Pipe Breaks
After you’ve successfully repaired a broken pipe, the last thing you want is a repeat performance. The good news is that a little proactive care can go a long way in preventing future plumbing headaches. By paying attention to your home’s plumbing system, you can protect your pipes from the common culprits behind cracks and bursts. It’s all about staying ahead of potential problems before they turn into emergencies.
Think of it like this: you wouldn't drive your car for years without checking the oil, and your home's plumbing deserves the same attention. Simple, regular checks, protecting your pipes from the Okanagan’s seasonal extremes, and making sure your water pressure is in the right range are the three pillars of a healthy PVC pipe system. Taking these steps will not only save you from the stress of unexpected leaks but also help protect your home and extend the life of your plumbing. It’s a small investment of time that pays off with huge peace of mind.
Perform Regular Maintenance
One of the easiest ways to prevent a major pipe disaster is to catch problems when they’re small. Make it a habit to periodically inspect visible pipes in your basement, crawlspace, and under sinks. Look for any signs of trouble, like tiny cracks, discoloration, or slight bulging. It’s crucial to address minor leaks promptly before they have a chance to worsen. Even a slow drip can indicate a weak spot that could fail under pressure. If you spot a leak you’re not comfortable tackling, it’s always best to call for a professional plumbing repair to get it sorted out correctly and prevent further damage.
Protect Pipes from Extreme Temperatures
Here in the Okanagan, our pipes face both intense summer sun and freezing winter cold. For any outdoor PVC pipes, sunlight is a major enemy. UV rays can make the plastic brittle over time, leading to cracks. A simple and effective fix is to paint the pipe with a coat of water-based latex paint, which acts as a shield against the sun. In the winter, pipes in unheated areas like garages or crawl spaces are at risk. While PVC is more forgiving than metal, it can still become brittle and crack in freezing temperatures. Wrapping these vulnerable pipes with foam insulation is a quick and inexpensive way to keep them protected.
Manage Your Water Pressure
You might not think about your home’s water pressure until there’s a problem, but it plays a huge role in your plumbing’s health. Water pressure that’s too high puts constant strain on your entire system, including your PVC pipes, fittings, and appliances. This stress can eventually lead to leaks or a sudden burst. According to plumbing standards, your home’s water pressure should ideally sit between 40 and 80 PSI. You can check this yourself with an inexpensive pressure gauge from a hardware store. If you find your pressure is too high, the solution is often a pressure-reducing valve. Installing or adjusting one is a job best left to a professional to ensure it’s done safely and correctly.
Know When to Call a Plumbing Professional
While tackling a PVC pipe repair yourself can be satisfying, some situations are best left to a certified plumbing professional. A botched repair can lead to much bigger, more expensive problems, including water damage and mold. Recognizing your limits is key to protecting your home. As a Red Seal Plumber with over a decade of experience, I've seen firsthand how a small issue can escalate when not handled correctly. The goal is a permanent, reliable fix, and sometimes that requires specialized tools and experience that go beyond a standard DIY toolkit.
Knowing when to put down the tools and pick up the phone is just as important as knowing how to make the repair. If you find yourself feeling unsure or if the problem seems bigger than you initially thought, it’s always the safer bet to get an expert opinion. A professional can not only fix the immediate issue but also inspect the surrounding plumbing to catch potential future problems.
When the Repair Gets Complicated
A straightforward break in an exposed pipe is one thing, but plumbing systems can be complex. It's time to call for backup if the broken pipe is in a hard-to-reach area, like inside a wall, under a concrete slab, or buried underground. These repairs require specialized equipment, like our HD waterproof cameras, to assess the damage without major demolition. If you're dealing with multiple leaks, can't determine the full extent of the damage, or suspect the break is part of a larger system-wide issue, a professional diagnosis is essential for a lasting solution. Don't risk turning a simple fix into a major renovation project; let a pro handle the tricky spots.
When Should You Call a Red Seal Plumber?
While a basic PVC patch is a great DIY project, some situations in the Okanagan require professional grade equipment:
- Slab Leaks: If the break is under your concrete foundation.
- Frozen Bursts: If multiple lines have split due to extreme cold.
- Wall Leaks: If you suspect a leak but can't find it without thermal imaging.
Need an immediate fix? We offer 24/7 emergency plumbing services across Kelowna and the Okanagan. We provide upfront, transparent pricing so you never have to guess the cost of your home's safety.
What to Expect for Professional Repair Costs
Cost is a valid concern for any homeowner, and professional plumbing rates can vary. While some companies bill hourly, we believe in upfront, transparent pricing so you know the full cost before any work begins—no surprises. The final price will depend on the location of the pipe and the complexity of the repair. For larger, unexpected jobs, we also offer flexible financing options to ease the financial burden. Members of our TruLoyalty+ program also benefit from a two-year labor warranty on repairs, giving you long-term peace of mind in the quality of our work.
Related Articles
- 24-Hour Emergency Plumber: What to Do When You Need Help Fast
- 4 Signs It’s Time to Call the Plumber (What to Know)
- Understanding the Cost of Poly-B Replacement in Kelowna: A Homeowner’s Guide
- How to Prevent Emergency Plumbing Situations
- Thumb That Plumb: Spotting and Fixing Common Plumbing Problems
Frequently Asked Questions
1. How long will a temporary fix like repair tape or epoxy last? Think of temporary fixes as emergency first aid for your pipe. They can stop leaks for a few hours or up to a day, giving you time to gather materials or schedule a professional repair. These fixes are not designed for long-term use under constant water pressure — replace them with a proper repair as soon as possible to avoid flooding.
2. My permanent PVC repair is still dripping. Why? A drip usually means the seal wasn’t done correctly. Common mistakes include:
- Not smoothing pipe ends with sandpaper or a deburring tool
- Skipping primer before applying PVC cement
- Not twisting and holding the pipe firmly for at least 30 seconds
- Following proper solvent-welding steps ensures a strong, leak-free bond.
3. Can I use standard white PVC pipe for hot water? No. White PVC is only for cold water. Using it for hot water will soften, warp, and eventually fail. For hot water lines, use CPVC pipe (cream or light yellow) with the correct cement. Using the right material is essential to prevent future leaks and costly damage.
4. The PVC cement says to wait an hour — is that enough? The can’s guideline assumes ideal conditions: warm and dry. In cooler or humid areas — like a basement in the Okanagan — the cement may take longer to cure. Rushing this step is a common cause of failed repairs. Wait extra time before turning the water back on to ensure a solid seal.
5. My broken pipe is inside a wall — can I fix it myself? If the leak is behind drywall, it’s best to call a licensed plumber. Cutting walls can be risky — you might hit wiring, insulation, or structural components. Professionals use specialized cameras and tools to locate the leak accurately and perform a repair with minimal damage.
6. Can freezing temperatures crack my PVC pipes? Yes. Water expands when frozen, which can crack or split PVC pipes. Insulating exposed pipes and maintaining steady indoor temperatures during winter can prevent costly burst pipes in the Okanagan.
7. How much does it cost to repair a broken PVC pipe? Acting quickly can save thousands in water damage restoration.
- DIY repair: $20–$100 for materials
- Professional repair: $150–$600+ depending on location and access
- Major wall or underground repairs: $400–$1,200+


.webp)